When a pack of little pranksters appears in a family, the question arises of what to do with children in their summer cottage during the summer. In addition to "socially useful" works and bicycles, kids can be offered a playground. You can break this right in your country yard. The new review presents examples of just such playgrounds.
1. Carousel

If the area of the yard and finances allow, you should think about building a large children's carousel. To implement such a project, you will need wooden beams, a rotating mechanism, cables, strong wicker baskets and, of course, building skills. The main thing is to take care of the reliability and safety of the structure, and the joyful faces of the children will be a worthy payment for the efforts.
2. Territory of childhood

Fence off a small piece of the backyard and organize a playground there. It can be a very modest corner with bright paths, a table, a bungee and a makeshift house, or a full-fledged amusement park with swings, carousels and slides.
3. Mini-garden

Let your child feel like a real gardener. Separate a small piece of land with stones or wooden blocks, plant flowers, greens and any other plants there and teach your child how to care for them. Such a garden will teach the baby to work and responsibility, and the harvest grown by one's own hands will be an excellent reward for efforts.
4. Sports ground

Wooden stumps and bars are perfect for building a small sports ground in your own yard. Such uncomplicated attractions will definitely appeal to children and will not let you get bored during a family vacation in the country.
5. Slides

A wooden structure with slides is an idea that will suit those who have a rather big space. Slides can be bought, or you can make your own, but in any case, the children will be happy.
6. Trampoline

A trampoline is a wonderful attraction that will delight both children and adults. To do it yourself, unfortunately, it will not work out, but soon the costs will justify themselves.
7. Pointers

Come up with fabulous names for all the structures in the yard and make bright signs with your child. Such signs will help children better navigate the terrain and allow you to turn your stay in the country into a fun game.
8. Checkerboard

From wooden boards or plywood, you can build a beautiful chessboard that will appeal to adults and children, and will also become an original backyard decoration.
9. Swing

Unnecessary car tires can be turned into a charming swing. In addition, the creation of such an attraction does not require any special skills and special costs.
10. Slate board

So that the children do not get bored while their parents work in the garden or sunbathe in the sun, hang a large slate on the fence or on the facade of the house.
11. Bowling

An ordinary concrete path can easily be turned into a bowling alley, and plastic bottles make excellent skittles. Instead of a bowling ball, you can use a tennis ball or any other heavy ball.
12. Target

It turns out that noodle harnesses can come in handy not only in the pool. From them you can make a bright and colorful target for throwing balls. Such an attraction will not only amuse children, but will also contribute to the development of speed, agility and coordination.
13. Water mattress

From a plastic film, you can make a large cool mattress filled with water, which will give a lot of joy to adults and children.
14. Twister
Backyard obstacle course.
The backyard can be turned into a small obstacle course for active children's fun. From improvised materials you can make a rope labyrinth, islands, bungee, cable car and much more. Such a playground will not only be a field for fun games, but will also help to significantly improve the physical shape of children.
In continuation of the topic, we present more that must be implemented this summer.
Reading time ≈ 9 minutes
A country house is a great place to relax from city troubles and unnecessary fuss. Here you can enjoy the fresh air, the beauty of nature, and also start arranging your site. Therefore, it is so important to have a dacha where you can hide from all problems at any time and fully relax in the presence of family and children. There must be a small playground in the local area so that the child has something to do. Arranging a play area on your own is not as difficult as it seems at first glance. By choosing the right place and preparing the necessary materials, you can build a whole installation with a slide, a sandbox, and even a mini-pool.
How to choose a seat
When leaving the city, we, of course, take our children with us. On the territory of the personal plot, they can play in the fresh air as much as they like. That is why it is so important to equip them with a space for games that should be interesting and at the same time safe.
The choice of the location of a do-it-yourself playground in the courtyard of a private house should be approached responsibly and seriously:

What should be the playground
Before you independently build a playground for children in the country, you need to draw up a rough plan and draw a drawing. When arranging the space, it is important to consider the following nuances:

Today, there are a number of safety requirements that every playground for children must meet. How to make a playground suitable for your child:

How to choose material
It is better to choose the design of the play area together with the child, because it is very important to take into account his desires and preferences. And the choice of material lies solely on the shoulders of the parents, the modern assortment today is quite extensive.
What objects can be included in the arrangement of playgrounds:

What materials are better to choose when decorating a children's play area in the country:

Creation technology
Before proceeding with the independent construction of structures in the playground for children, the space should be well prepared:

DIY sandbox
One of the main elements of any playground is a sandbox. Consider, as an example, how to make it out of wood with step-by-step recommendations:
- Place the sandbox in an open area with a good viewing angle and visibility so that the child is always in the parent's field of vision.
- To make it comfortable and safe to play in it in the summer, you can install a fungus or an umbrella over the sand to create shade.

- First you need to build a base, take the dimensions of a square of 1.7 by 1.7 meters. For marking, you can use pegs, as well as a special fishing line or tape. The main goal will be the impossibility of accumulating rainwater inside.
- We remove the top layer of soil up to 0.3 meters (or 20 centimeters). When creating the base, remember that the sand should not mix with the ground. Therefore, the basis of our sandbox will be a dense polyethylene film or special geotextile (we make holes in it up to 10 mm in diameter). Under the base we pour a little sand in a thin layer.

- Let's start processing the details of the frame. Since it is wood, all elements must be well sanded and coated with a special treatment. These will be the following components: 4 beams 50 * 50 * 450 mm, 4 boards 25 * 300 * 1700 mm, 4 horizontal boards for creating sides 25 * 150 * 1700 mm.
- We proceed to the assembly of the frame only when all the elements are carefully treated with an antiseptic. First, according to the marking, we install 4 beams to a depth of 150 cm, they must be laid strictly along the perimeter of the square.

- We nail the boards to the bars, fixing them with nails. So we fix the corners and align. After that, we proceed to the installation of horizontal boards, children can lean on them during the game or sit. Fasten them with screws.
- We lay geotextiles or a protective film on the base, after which we mount another row of boards. We remove the excess polyethylene, you can cut it off with scissors.

- At the finishing stage, you can install protection from the scorching sun. Most often in sandboxes you can find a wooden fungus with a wide hat, painted with intricate patterns in bright colors. But we will make two small benches.

- To fill the structure, bring some coarse-grained river sand up to 900 kilograms into the sandbox. The sand must be cleaned of dirt and sieved before the child can play with it.
- We fix the boards and seats, as shown in the photo, the video instruction will be below. Our sandbox is ready!
We will send the material to you by e-mail
D For the normal development of children, they need to actively spend their free time - run, play, have fun. When creating playgrounds, the main attention is paid to their safety and functionality. To build do-it-yourself playgrounds on a suburban area or cottage, the photos of which you will find in this article, you will need some tools, carpentry, construction and locksmith skills.
Homemade playground
The design of playgrounds with their own hands, the photos of which are posted on the Internet, implies the presence of certain equipment. If you do not have something, do not be discouraged, here are a few ideas that will help you equip a playground.


Making a slide-house
A do-it-yourself playground in the country, a photo of which you can find on the Internet, always includes a slide or a slide-house. The base of the slide is a frame of 4 vertical posts. You can use only 2 racks, but then the possibility of creativity is reduced and the slide will be limited to one slope and one lift. On a frame of 4 racks, you can make a slide with one slope and several lifts. Make one lift in the form of a ladder, the other with normal steps, and the third with a rope.

This design seriously diversifies children's leisure. For a slide with a straight slope, it is undesirable to make the angle of the slope more than 30 degrees relative to the ground in order to avoid excessive acceleration and injuries.

Helpful advice! If possible, use a plastic ramp sold in stores. With it, children will have more fun than with a straight wooden ramp.

What to make a slide-house
For this you will need:
Foundation preparation
Find a place for the slide and prepare a hole for the frame foundation. We recommend making a square frame with a distance of 1 meter between the posts. The size of the side of the pit should be 1.5 meters, the depth should not be less than 20 cm. Seal the bottom of the pit and pour a layer of crushed stone (fraction 15–25 mm) 10 cm thick there. compact it. You can also get by with small holes for each bar. In this case, the depth of the pit should be at least 50 cm. Saturate the lower edge of the beam with diesel fuel and molten bitumen, the treated part should rise 1.5–2 cm above the ground. Pour a crushed stone pillow on the bottom of the pit - a fraction of 15–25 mm, a thickness of 5 -10 mm. Insert the posts into the pit, level and ensure they are properly oriented - their edges should be parallel to each other (this is not required with logs or round bars). Then pour concrete.

Helpful advice! The less water in the concrete, the stronger it will be. To make thick concrete more mobile, add plasticizers to it, which can be bought at a hardware store.
Bottom harness and slope
Tie the bars with a 50 mm thick board at the floor level of the house, and also install one longitudinal jumper. Fasten the boards to the bars with self-tapping screws at least 100 mm long. From a board with a thickness of 25 mm, make a tray for a ramp. To do this, cut 2 boards, the length of which is slightly greater than the length of the slope. Mark the angles of contact with the frame strapping and the ground, then cut the board with a circular saw or jigsaw. Attach the boards to the harness to make sure you did everything right. Then cut jumpers from the same board. The length of the jumpers is equal to the width of the slope. Lay the long boards on the ground and, using self-tapping screws, attach jumpers to them from the bottom side.


The distance between the jumpers is not more than 30 cm, and install the first and last jumpers 5 cm from the edge. Make such a cutout in the upper edge of the board so that the slope rests on the harness as if on a shelf, and the jumpers are flush with the harness. Attach the ramp to the harness using the corners of the bolts with nuts and self-tapping screws. Set the corners so that children do not get scratched. Fasten the corners to the slope with bolts and nuts so that there is nothing protruding or sharp from the side of the slope. Sew up the slope with plywood using self-tapping screws. They must be recessed by 0.5–1 mm, then puttied and sanded. Secure the bottom edge of the ramp with pins driven into the ground or anchor bolts.

Ladder
Cut two pieces of board 50 mm thick, the length of which will be slightly greater than the length. Mark and cut the corners of contact with the strapping and the ground. Cut 24.5 mm wide grooves in these boards for the installation of steps, then cut the steps to the required width and assemble the ladder. Fasten the steps to the side boards with self-tapping screws. Attach the ladder to the harness and the ground on the side opposite the ramp. Attach supports and railings to both sides of the stairs. They can be made from a board with a thickness of 25 mm. Supports and railings must be processed using a manual or electric planer to eliminate sharp edges, and then carefully sanded. The upper edge of the railing must be attached to the uprights.

Additional entrances, top trim and roof
On one of the sides, make a ladder from the same bar that went to the racks. Process the cut bars with an electric planer to slightly round the edges. Attach these bars to the posts at a distance of 20-30 cm from each other. Screw the first bar at a distance of 20-30 cm from the ground. Prepare an extreme ascent to the house. To do this, make the same tray as for the ramp, but set at an angle of no more than 20 degrees with respect to the uprights. Tie the posts at the level of the ceiling of the house with a board 50 mm thick. From the side of the extreme entrance, reinforce the strapping with steel corners. Cut and lay the plywood on the floor, then hem the plywood on the ceiling. Sheathe the house with plywood on the outside, making round or oval entrances. Determine the size of the entrances / exits yourself so that the child is comfortable. To make the roof, cut 4 rafters from a 25mm board. The angles of the rafters are determined based on the height of the roof. Attach the rafters to the corners of the frame and connect them together from above using metal corners. Cut the plywood into pieces of the required size and sew up the roof.

Cutting plywood with a jigsaw
Final works
When finished, be sure to sand all the places where the child can drive a splinter. Then treat the slope, steps and extreme rise with parquet varnish. Attach a rope 10-15 mm thick to the top harness on the extreme side and tie knots on it every 20 cm. Paint the house so that it looks beautiful.

So that the children in the country house or near the house do not explore the beds or any other places where they should not be, they need an interesting corner for them. As a rule, parents come to the idea of the need to create a playground or a sports corner - it depends on the age and desire of the children. A self-made playground is good because during its construction it is possible to provide for the possibility of its gradual transformation. After all, what is suitable for 2-3 year olds is no longer liked by 5-6 year olds, and even more so for older children. And besides, a do-it-yourself playground is often built not so much for reasons of economy, but for the desire to please the child: who knows better than parents what your child likes ... Someone needs a pirate ship, but someone needs their own, real, house with a porch, a door and all the necessary attributes.
Do-it-yourself Danish playground - a place for your favorite offspring to play in the country or in the yard
Choose a location
It will be a difficult task to solve. Firstly, it is desirable that the playground be viewed from the house, and from the room in which someone is most of the time. Ideally, if the site is viewed from several rooms or points. Secondly, it should be located away from outbuildings with "aromas", if any. Thirdly, it is desirable to take into account the fertility of the soil: an infertile area or with complex geology can be allocated for the game complex: there is no need to dig into the ground, maximum - 30-40 cm bury pillars.
When choosing a place, it’s a good idea to place a children’s play area near a wall or a solid fence. These zones can sharply be fully used, and in this case they can be used for games. For example, make a mini climbing wall on the wall, fix rope ladders, a slate board and other devices no less interesting for children. You probably know what your children like, and if you don’t know, you can find out: there are enough fences and walls, place different devices in different areas and watch where your child stays longer. So find out which games he is more drawn to, you will know in which direction to move on.
Slate board on the fence - children entertainment and development of fine motor skills of hands
Lighting must also be taken into account. The place for children to play should not be constantly in the shade, but the sun is also not needed. Approximately 2/3 of the site should be in the shade (, swing), and 1/3 - in the sun - if any, an active play area. If there is no shade on the site, you will have to come up with a canopy or put up a large umbrella.
At the same time, please note that there is no constant draft in the area of the proposed site. Children, of course, need to be tempered, but not in this way. Even when choosing a place for a children's play area, pay attention to the fact that electrical appliances or any shields, machines and other similar devices are not located nearby. Children are curious and inventive, so it's better not to risk it.
What area is needed
A little about the area that needs to be taken away for a children's playground. Small children don't need much space - a sandbox, a few very simple projectiles, a small pool if you think possible. It's nice to have a lawn, or a flat, smooth piece with some kind of suitable surface, where you can lie down to your heart's content. That's all. For all this, an area of \u200b\u200b4-5 square meters is enough. meters.

For small children, it is desirable to enclose the area. This will give you the opportunity not to be constantly nearby, but to do your own business nearby: children in sight and safe. The fence can be any - it's all about your imagination, desire and capabilities. The main requirement is that it must be safe and durable or completely inaccessible to children. For example, like the chain-link mesh that you see in the photo above. It comes with a plastic coating of bright colors and does not look as harsh as usual.

PVC-coated chain-link mesh is a good option for fencing playgrounds
If for some reason you don’t like this option, you can put a picket fence, which will be about the height of the children’s shoulders, the distance between adjacent planks should be such that the head does not crawl there. Fences can be painted with different colors.

Picket fence - a familiar fence in an unusual design
Just pay attention that the tops are rounded and do not have sharp corners, they are well processed: splinters are very frustrating for children. The fence must be firmly attached. With the expectation that the children will definitely hang on them and jump.
Rope fencing is rarely used, but it looks good, it performs its functions perfectly: durable, safe, aesthetically attractive.

Rope fence for a playground - durable, inexpensive, reliable and safe
For older children, the fence is a relic. For them, the field of activity is the entire site, and only something really interesting can distract them. More space is also needed here. If possible, give children under 7 years old 8-9 m 2, from 7 to 12 years old - up to 12 m 2. Here the set of shells is already more serious, which is why large areas are required.
Playground cover
This is a complex topic with a very difficult choice. While the children are small, they are great (there is a special composition of herbs with high abrasion resistance). He is not so attractive in appearance, but is able to endure little pranksters with almost no damage. The disadvantage of lawns is the need for regular care: watering, mowing, etc.

For small children, the ideal playground surface is lawn grass
The lawn can no longer cope with the load from the games of grown children. Especially in the zone of active games: near slides, swings. These are the most problematic areas. If you leave these areas "as is", then during the rain a puddle forms under them, after a couple of "races", turning into a swamp. There is a good solution: make a drainage pad out of crushed stone, and fill it with sand or lay a rubber coating like that used in stadiums. It is durable and strong.
To remove moisture from the area of the playground, they remove the soil to a depth of 15-20 cm, fall asleep and ram the rubble, pour it on top and also ram the sand. Both layers are approximately 10-15 cm each. During construction, you can already stop at this: landing on such a site is already not bad. But the sand is gradually pulled apart, and it will have to be periodically updated. You can spread a rubber mat. This is already more serious, only it will be necessary to make a slight slope so that the water rolls off it during the rain. Someone just lays rubber mats, which are replaced as they wear out.
Another way out is to fill the entire site with fine, sifted sand. It will periodically need to be leveled and topped up, but this is perhaps the most practical way out.

Sand playground cover - from the category of "quickly and without much hassle"
Another option is to pour crushed bark. Another question is that not everyone has the opportunity to take this bark. But if there is, try it. The covering is soft and not traumatic. Only it is necessary to grind it well and remove the chips that may be there.
Of the more technologically advanced, we can offer the following:
- Regupol. Factory rubber coating, laid on a flat concrete or asphalt base. The cost is $25-70 per square meter.
- Coating of crumb rubber with the addition of a binder. It is poured onto a prepared leveled area (it is possible on compacted sand laid on top of crushed stone). The price is $25-80 per square meter.
- Modular high density PVC systems. Plates that are connected according to the principle of puzzles. The price of a "square" is $50-70.
- artificial grass. It is laid on a prepared base of quartz sand and crumb rubber, requires water drainage. Depending on the height of the pile, it costs from $40 to $80.
It's hard to choose. There are too many mutually exclusive requirements and desires, but something will have to be chosen. The most common option is lawn, the second most popular is sand. The remaining coatings are applied only in places - in the most "loaded" parts.
The choice of equipment for the playground
Planning the elements of the playground is best with children. After all, it is for them that you are going to build a playing area, and it is their desires that you need to listen to. Often we try to reproduce what, in our understanding, should be interesting for them, and then we are surprised that the children play anywhere, but not on the site, which they built with such love. All because you embodied your desires and expectations, not children's. Listen to what the child wants, walk around the guests who already have similar facilities, see where the child spends more time. On this basis, it is already possible to build something.

For kids, there must be a sandbox on the playground. This develops their coordination, allows them to develop faster. The usual design - four boards - is not a problem to knock down, but I want it to be also beautiful. For the boys, the sandbox-machine will be interesting. It is made of two-color painted moisture-resistant laminated plywood.

Under the hood is a toy box. Inside in the cockpit, there is also an “entrance” to this box.

In general, wooden cars for boys are great fun. They are passionate about it. another option from an old barrel.

Behind, by the way, you can also arrange a sandbox ...
Another interesting idea is how to make a shadow over the playing area: fix a rod at a height, throw an awning over it, making a kind of tent. And it's not hot, and there is shade.

Almost a ship...
Children's houses
The most popular part of the play corner with children is your own house, where you can hide from the all-seeing eye of adults, set your own rules. For children, it does not matter what their house is built of. They play well in a fabric tent, a hut made of branches. There are many designs that are quickly and easily "built". Moreover, even the smallest can be involved in this construction: it will be even more interesting to play in a house built with your own hands.
For example, a hut. Watch children play. This is exactly the building that they erect most often. In different regions they call it differently: someone is their “headquarters”, someone is “home”, a hut, a halabuda. They usually use sticks, bedspreads, other improvised material. Based on this "chalabudostroenie", several of the following designs of houses for children were made.

The cheapest way to build a summer house for children is to put a few poles in a hut, plant them around the bindweed and wait a couple of weeks for them to grow. The shape of this living hut can be any: in the form of a cone, as in the photo, a traditional hut, more like a house, etc. Tie the poles together with twine, plastic clamps, or something similar. It is only important to ensure a sufficiently stable frame, otherwise naughty children can overwhelm the structure.
In general, it is not necessary to wait until the plants grow. You can sew a fabric cover, make an entrance, like in a wigwam ... There are a lot of opportunities for using fantasy.
A quick and absolutely safe way to build a children's hut is to fix fabric panels on the hoop. Hang this design, for example, on a tree. Under it, lay out the mats, attach the panels to the edges. It will turn out an excellent summer house in which children will be cool and cozy.

A hoop and fabric hut - fast, cheap, safe
Moreover, this design is suitable not only for girls. Hang a camouflage net or camouflage fabric on the hoop. The boys will definitely make their headquarters in it.
If your child dreams of a house like yours, there are even more options. It is usually built using frame technology: pillars are buried in the corners, the lower and upper trims are attached to them. The lower trim is the basis for the floor, the upper one is the ceiling. If the house is planned high, a sandbox is often placed below. The house located on top closes it from rain and sun.

If the house is planned at ground level, construction can be started in a different way. Set the blocks on which it will stand level, lay a beam (80 * 80 mm or 100 * 100 mm) on them, connect it into a rectangle, fasten the corners with metal patch plates. After already attach to the bottom frame in the corners of the rack, which will become a support for the walls and roof.

Some children like to have a house, just like adults have: with a porch, a real door and a window, a sofa ... This is also what parents have done more than once. The basis is the same: a beam from which the frame of the building is assembled, and it is sheathed depending on the desire. Faster to work with sheet material, such as waterproof plywood, longer - with boards or clapboard.
House, as from a fairy tale - carved, on a stump
Slides for children
Slides are no less popular with children. The fast descent is a lot of fun. This is where parents get in trouble. What to make a children's slide? The traditional coating - a sheet of stainless steel - has now become very expensive, and it is dangerous to leave it on the street unattended - they will carry it away. Ordinary steel will not work - it rusts very quickly, so you have to look for a replacement. There are several options:

And only a hill in the country or near the house is very rarely done. Usually this is only part of the game complex, which includes various shells: rope and ordinary ladders with different angles of inclination, hanging paths, nets, swings on chains or ropes, poles with crossbars and, in general, everything you can think of. You will find a few ideas below in the photo gallery.
Wooden slide - only part of the play area for children in the country
Swing
Suspended are popular not only among children, but also among adults. There are many different options - from models for toddlers to older children. Some of them you saw in the photo above. To create such entertainment, not many materials are needed: chains or ropes on which the seat will be attached.
If you use ropes, you must regularly check their condition: they become less durable from exposure to the sun and can fray. Chains are more reliable in this regard: they can withstand heavy loads, but they pose another danger: moving chain links can pinch the skin. It is very painful, and large hematomas are obtained. But there is a way out. To keep it safe, hoses are put on the chains in those places where they are taken by hand. Their shell protects the hands of children and adults who swing the swing (or ride themselves).

Only bad luck - curious kids love to pick pipes, so check them periodically. Sometimes covers made of very dense fabric such as tarpaulin are used as a protective layer.
Often there are questions about how to attach chains or ropes to the crossbar. The most popular solution is the carbine. But they have two drawbacks: when rocking, they creak quite strongly, and besides, they gradually wear out. The rate of wear depends on the mass of the swinging children (they do not always sit on the swing one at a time) and on the intensity of use. Both problems can be partially solved by periodic lubrication, but only partially. The second option is to use bearings, but welding is indispensable here. See the photo below for a few options on how to attach a swing to the crossbar.
Where to get such devices? In shops selling rigging. You may find other ideas there.
Often the question arises: how and from what to make a seat. Yes, from anything. Even from a tire or from a piece of tarp, an old chair - wooden or plastic, just a piece of board. Craftsmen manage to use the old chair.


A circle tied with ropes is a great option

Old swing chair - why not?
Having slightly modified them and hung them only slightly above the ground, we teach not a swing, but a simulator for developing balance. Of particular interest to the boys will be the option with a board from a skateboard. And on a wide platform you can swing while sitting ...

Stairs and walkways
Ladders are one of the key elements that connects all the disparate parts into a single whole, allowing you to move from one projectile to another. They are made from well-crafted wood. The steps should be round (at least 5 cm in diameter, so that it is convenient to take it with your hands) and straight. You can make rope steps: they are harder to climb, but they develop coordination well.

Rope climb - difficult, but very interesting to overcome
Hang a rope net on one side, make a rope ladder. Rope shells are not in vain present in all extreme shows. They are safe, but require well-developed coordination and dexterity. At first, it’s hard for the kids, but it’s precisely for such “shells” that they are drawn.

A rope wall and ladder is a great way to make the playground more interesting to play with.


Here is the basic set of elements from which children's playgrounds are assembled. For older boys, you can add a horizontal bar and rings. They already need to develop not only coordination, but also muscle strength. In general, there can be a lot of ideas. Some of them are in the photo below. We hope that the playground made by your efforts will bring joy to children, and pleasure to you: it is always nice to look at what you have done with your own hands.
Photo of playgrounds and elements


A water mattress in the heat is the best place to relax

Getting off the platform from the ropes - for coordination of movements


Playground with a house on high legs - drawing with dimensions


One of the options for a children's house with a sandbox under one roof


Hemp - a handy projectile


Children's corner - pirate ship


Metal complex - for those who know how to cook metal

If there are small children in the family, they definitely need to build and subsequently equip an outdoor playground. Such play areas are an indispensable object on the territory of a private house or cottage.
While the kids are playing outdoors, adults can relax or do housework. As soon as the parents are free, they can always join the children.
An open play area can be made much more interesting, more fun and colorful if you make crafts for the playground. It is not necessary to buy ready-made garden decorations, because there are a lot of exciting ideas that can be easily implemented.

Tire dinosaur
Bottle palms and a plastic zoo
Perfect for making crafts and decorations for the playground.
If you collect bottles of different shapes and sizes, you can make very interesting compositions: palm trees, animal figurines, flowers and other objects. Try making an exotic palm tree corner or a fun menagerie.

It is very easy to make, for example, a piglet: a five-liter bottle is suitable for the body, and two-liter bottles for the limbs. The ears and tail are also cut out of plastic.
The bottle flower garden looks original: cut the necks in the form of bells and other flowers, and the leaves will be bases without a bottom, cut into several parts.
Decorate the bottles with paints and fix in the right places. Such decorations are very practical: they will not deteriorate either from rain or from the sun.
The palm tree is made as follows: the bottom is cut out from the bottles, after which the blanks are strung on top of each other. A metal rod is placed inside the bottles - the base of the tree. The crown consists of one or more bottles, cut from the bases to the necks into strips-leaves.

The strips need to be cut obliquely so that they look like real palm leaves. The crown bottle is inserted upside down into the barrel. To do without paint, you can use brown and green bottles.
Plywood is an ideal material for making flat figures. On it you can draw everything that your imagination tells you: heroes from films, characters from cartoons, etc. The figures are cut out, painted and placed on the site.
You can create a whole composition from individual elements or paint a bright picture on a large white piece of plywood. Such a picture can be used as a demarcation fence for areas in the garden.

Mounting foam is not used as often as plastic or plywood for playground decoration, but, nevertheless, very interesting compositions can be made from it.
Foam figures look like toys, they look great and kids love them. From foam, you can make any shape, which is then decorated.

Animal figurines from boulders
Large boulders and pebbles are a suitable find for decorating a playground. Round stones are decorated with bright colors, resulting in funny bugs, hedgehogs and other animals.
For stones, it is better to take acrylic paints, which are then covered with a transparent varnish. Pictures with clear contours look interesting.
The outline is first drawn in pencil, then in black or white. The space between the lines is filled with colored paints. From several boulders, you can make a whole family of hedgehogs or ladybugs.

Combining materials - a flight of fancy
Logs of various shapes and sizes are great for decorating children's play corners. Many materials go well with each other: logs or tires and bottles.

From bottles you can make a beautiful fence for a lawn or flower bed in the form of animals, plants and insects. Try to involve the child in the creative process: children always have several original ideas and solutions ready.
If there was an old sawn tree in the garden, do not rush to uproot the stump. A funny figure or a whole house with a door, a roof and windows will come out of it. It is not only fun for children, but also a wonderful decorative element for the garden.
A bright, positive composition can be made from bottles and a small tire. Nail bottle caps around the tire, then screw bottles into them - you get a cheerful sun.
Do not rush to get rid of unused building materials after repair. So, for example, ornate paths or the space around the figures can be laid out with pieces of ceramic tiles. Broken tiles are useful for laying out mosaics and depicting fairy-tale characters.

Draw the outline of the shape on the path, then lay it out with tile pieces. In order for the composition to be durable, it must be laid out on a cement composition. Do not forget to wipe the seams after drying.
In the video, interesting ideas for decorating a playground with your own hands:
It is an essential element of any children's play area. Babies like to have their own corner to hide in. are log and frame. The interior design depends on the imagination of the parents and the child.

Arbors from climbing plants
If it is not possible to build a wooden house, you can take note of an alternative option: a frame is made of wire, and any climbing plants (bindweeds, grapes, etc.) start around it. Such an arbor pleases the eye of both adults and kids.

Stump decoration
All ideas for the design of stumps can not be counted. Here are the most popular of them: the old forest man and the fly agaric mushroom.

When the bells ring back under a gust of wind, an unusual, fabulous feeling immediately arises. You can make them from iron bottle caps and unnecessary keys.

Make a cozy nest of branches with your baby and place a decorative bird or butterfly in it. Fix the composition on the tree.
A butterfly made together with a child contributes to the development of motor skills and creative abilities. You can make it from beads, clothespins and thick threads.

If you attach a pin to the back of the butterfly, it can be used as a decoration for clothes or curtains.
How else can you decorate a playground or a country yard - a photo selection:
Boxes and baby shoes
A wonderful pirate ship will come out of a cardboard box. You can also make decorative fences and dividers from boxes and unnecessary shoes.
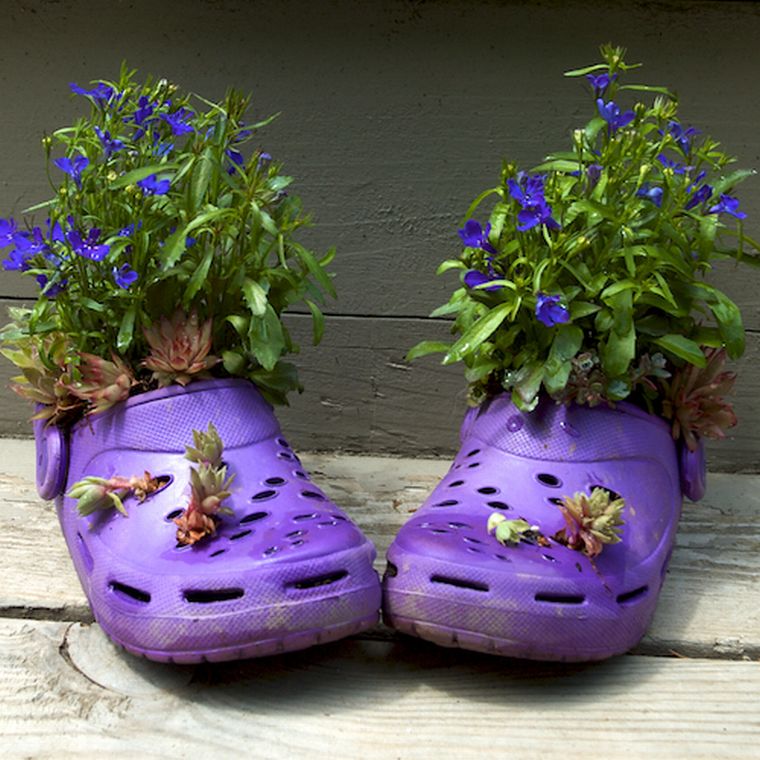
Materials for decorating a children's play area can be very different: from trees and stumps, to old shoes and empty bottles. The main thing is to show imagination and desire.