The key to the longevity of any structure is a reliable foundation. Pile driven foundations made of wood, often larch, were used by our ancestors for centuries in the construction of baths. Nowadays, they have been replaced by screw analogues, which, for ease of immersion in the ground, are equipped with a cone-shaped tip and blades on the surface of the pipe. What the floor in a bathhouse on screw piles should be like will be discussed in today’s material.
When starting to build a bathhouse, you need to figure out when it is appropriate to use screw piles, learn about their pros and cons, types, correctly calculate the load and carefully approach the choice, because piles differ in many criteria - tip shape, material, size. All these indicators affect the performance characteristics of the piles themselves and the foundation as a whole.

The construction of pile foundations is used in special conditions:
- When the soil at the construction site is heavily watered and permafrost.
- If construction is carried out on the shore of a reservoir.
- If floods occur with noticeable regularity in the construction region.
- If the site for the construction of a bathhouse has a complex terrain with a sharp difference in height (slope, hillock).

In the described conditions, the installation of a traditional strip or slab base is not possible. The advantage of a pile foundation is that it can be used on any type of soil, even if it is highly heaving - the main thing is to choose the right type of pile, while the level of groundwater passage will not have any effect on the quality of the foundation.

An important quality of a pile foundation is its seismic resistance, taking into account strict adherence to the quality and sequence of technological processes during its construction. As a result, the pipes are firmly secured in the ground and the impact of loads on them during frost heaving of the soil is eliminated.
Advantages and disadvantages of a pile screw foundation
One of the important advantages of using piles when arranging the foundation of a bathhouse is the quick completion of the work and the ability to carry it out independently or with one assistant. In this case, there is no need to have special professional skills, to construct additional structures (formwork), which require spending time, money and effort, and then wait for the solution to dry, as when installing a strip foundation. After installing the last head, you can immediately begin building the walls of the building.

The main advantages include the following:
- Quick installation.
- Obtaining a stable foundation.
- Convenience of work when repairing the foundation.
- Installation is possible in any weather conditions.
- Screw piles ensure natural ventilation of the bathhouse floor from the bottom.
- Ease of installation of the sauna sewer and water supply system.
- The pile foundation is durable and reliable.
- Due to the correct installation of the floor on stilts, the walls of the bathhouse are protected from the effects of melt and sediment water from the ground.
- Possibility of construction in conditions of unstable, moving soils.

Several parameters influence such a parameter as the durability of a pile screw foundation:
- The thickness of the metal from which the piles are made. It is clear that the greater the thickness, the longer the service life of the product. Thus, standard piles are made of metal 4 mm thick, and reinforced ones - 6 mm.
- Preparation method. If wood rots, then metal rusts. In this regard, solid piles are more stable than welded ones.
- Quality of the insulating protective layer. It can be made using single-layer painting with regular paint or have multi-layer treatment with anti-corrosion compounds and zinc coating.
- Method and quality of work on insulating pile foundations.

The disadvantages include the following:
- Piles will need to be serviced every 5 years. To do this, each pile is dug to a depth of 50 cm and the free area of the support is covered with an anti-corrosion compound. If this is not done, the service life of the foundation will be shortened due to the likelihood of rotting pipes.
- When installing piles, it is extremely important to maintain their strict vertical position, which is quite difficult to achieve when working alone. The result of the slightest deviation is a loss of the load-bearing capacity of the pile by 20% and the likelihood of subsidence of the structure.
- It is not possible to equip a full-fledged cellar, underground or basement floor.
- Steel screw supports are a good conductor of cold, so it is extremely important to perform high-quality insulation of the base, and to immerse the piles themselves below the soil freezing level by 20 cm.
Types of piles
Piles differ in many respects, so they are marked by purpose and divided depending on the thickness of the metal, as well as the type of tip.


How to choose the length of the pile
When calculating the length of a pile, several indicators are taken into account:
- Depth of dense soils. Often this value starts from 180 cm, to which it is necessary to add another 20 cm - this is the distance at which the tip of the support should be located.
- It will be necessary to take into account the height of the base, the value of which should not be less than 50 cm. It is due to this height of the floor of the building that it is possible to prevent its flooding and minimize the impact of moisture on the walls of the building. The height of the base is also selected depending on the region of construction and its characteristic snow cover in winter.
- In addition, you will need to take into account the topography of the site, when piles of different lengths can be used.
- When calculating the length, take into account the mounting hole, which is located at a distance of 10 cm from the top of the support. After the pile is installed, this fragment will be cut down.
In addition, the depth of soil freezing in a particular construction region is taken into account.

Prices for screw piles
screw pile
Floor materials
Wood (coniferous species) is most often used for flooring in bathhouses. Concrete screed is no less popular. Considering that a bathhouse is a room with special operating conditions, it is necessary to carefully select the flooring material. So, a concrete floor will become a reliable and durable foundation, but its installation will be somewhat more expensive than a wooden structure. Coniferous wood tolerates humidity and temperature changes well, but it will have to be regularly treated with antiseptics and after 10 years such a floor will have to be replaced.

However, a wooden floor is more preferable, since it can be repaired at any time by replacing a damaged element without dismantling the entire structure. And by regularly treating the floor with antiseptics, its service life will double. As an option, you can make a combined floor in the bathhouse - in rooms with high humidity (steam room, wash room) use a concrete screed, and leave a wooden floor in the remaining rooms.
Rules for insulation and waterproofing of bathhouse floors
You can begin laying insulation only after thoroughly treating the wooden structure with an antiseptic, which will protect the material from the effects of insect pests and prevent the formation of mold.

When choosing a method for insulating the floor in a bathhouse, various nuances are taken into account. To organize a drain in a bathhouse, wooden floors in the form of flooring with slots are more popular. You will also need to take into account the type of material for the finishing floor covering - concrete, tiles and porcelain stoneware take longer to heat up and cool down than wood and composite materials with wood fibers in their composition (decking).


Therefore, the most optimal insulation option would be to lay insulation between the rough and finished floor structures, installed along joists with a waterproofing membrane laid on top of the lower level to drain wastewater. In this case, it is recommended to replace the traditional drain with a design that uses a dry water seal. This will protect the bathhouse from unpleasant odors from the septic tank.

Advice. If the thickness of the beams is not enough to lay the required thickness of insulation, bars are attached perpendicularly to them, between which the missing layer of insulation is laid. Waterproofing material is laid below and above.

The durability of the floor structure and the effectiveness of the insulation depend on the quality of waterproofing in the bathhouse. There are several options for waterproofing the floor in a bathhouse: when installing a structure poured on top of piles, a built-up waterproofing roll or coating in the form of bitumen mastic is used. When installing a wooden floor, a waterproofing membrane is laid on top of the insulation.
Base design
Correct arrangement and insulation of the base along the perimeter of the building allows you to increase the degree of floor insulation with a pile foundation. The purpose of the plinth is that it insulates the space under the bathhouse and does not allow cold air to enter there, and also helps to improve the aesthetics of the appearance of the building.

The cladding is made using thermal insulation boards and decorative panels that imitate various materials - wood, stone, brick. Slab insulation materials (foam plastic, penoplex) are used as thermal insulation materials.
Important! After the panels are installed and fixed around the perimeter of the bathhouse, the joints between them are sealed with polyurethane foam.

Spilling or wet floor
This is the most popular design for baths on stilts. It requires high-quality thermal insulation if the bath is to be used in winter. All water that is used in the bathhouse is drained directly onto the floor and removed to the sewer or drainage system through a drain hole (ladder) installed at an angle in the floor structure.

Therefore, it is extremely important to ensure the moisture resistance of such a floor and the rapid, high-quality removal of water from its surface.
There are two types of poured flooring - completely wooden and combined. In the first case, the boards are laid on top of the beams or joists in such a way that gaps 3-7 mm wide are formed between them. Under the flooring there is drainage in the form of crushed stone, laid on a sand cushion to a height that does not reach the bottom of the floor level by 10 cm. During the operation of the bathhouse, the used water goes into the drainage and there is no need to install a sewerage system. But this method of organizing the floor has its own nuances: in winter it will be cold in such a bathhouse, and high-quality removal of moisture from the drainage depends on the presence of sandy soil.

A more comfortable design is a leaky floor installed above a concrete screed with a drain hole. Crushed stone and reinforcing mesh are laid on top of the soil, laid at an angle to the drainage pit, and a screed is poured. Beams and plank flooring are laid on top.
Dry floor in a wooden bathhouse
When creating a dry floor, 2 planks are made. The first is rough, with the obligatory laying of a waterproofing and insulating layer on top. The top of the insulation is also covered with waterproofing. The finishing flooring is made of durable tongue-and-groove boards, for the manufacture of which softwood was used. One of the corners of the room is formed with a slope in the direction of the drain built into the floor.

Concrete floor installation
Before starting work on pouring a concrete floor, it is necessary to carry out a number of preparatory measures:
- Install water and sewer pipes.
- Install a drain ladder.
- Prepare the base - compact it and prepare it for pouring concrete.

Table 1. Floor arrangement
| Illustration | Description |
|---|---|
 | Concrete mortar, about 5 cm thick, is poured onto a compacted base on the ground. |
 | Insulation is laid over the waterproofing layer and covered with film. |
 | Pour a second layer of concrete screed reinforced with metal mesh. |
 | The surface is leveled. |
Types of insulation Before laying the insulation, the rough screed is cleaned of debris, dust-free and covered with rolled waterproofing. If fractional insulation is used, then it is applied in the form of a special mixture, after drying, which can be used to begin pouring the second layer of concrete mortar.
When using insulation in the form of slabs, the joints that are formed during their installation will need to be sealed with polyurethane foam. A second layer of waterproofing is laid on top. The second layer of concrete screed must be reinforced with metal mesh.
Video - Construction of a bathhouse on screw piles
|


If the construction of a steam room is planned in an area with a rainy climate and a high level of ground moisture, then the best solution would be a bathhouse on stilts. Ideal waterproofing does not exist in nature. The box of a wooden bathhouse, raised above the ground, is deprived of direct contact with wet soil, and excellent ventilation blows out the remaining water condensation from under the foundation on screw supports.
Bathhouse project on screw piles
The most unsuccessful way in the process of choosing a suitable internal layout is to come up with your own layout of a bathhouse or try to build a building of an unusual complex configuration on stilts. A bathhouse, even the simplest one, assembled from profiled timber, is a complex complex that is calculated and adjusted in practice to the required dimensions and characteristics. Any mistake in ensuring the rigidity or stability of the walls will lead to subsidence and rupture of the roof joints.
Therefore, even the most inveterate lovers of a good steam room prefer to use a standard design of metal supports to build a bathhouse on screw piles with their own hands. To a standard box on a base with screws, they simply add small details, for example, use their own floor and decorative wall trim.
One such project is shown in the diagram and figure below.

Main characteristics of a bath box on metal screw piles:

A rigid base on screw piles ensures good stability of the bathhouse, but there is no point in making the sauna or steam room higher; it will be cold and very humid. You can’t reduce the height of the ceilings; the room will turn out cramped and stuffy.
How to build a sauna on screw piles
The seemingly ideal solution to make a bathhouse on stilts actually conceals many small problems, which are best solved at the stage of sketch drawing and rough design. You can build a bath project box on 6x6 m piles using a team in 12-15 days. Of these, 1-2 days will be required to immerse the foundation of screw piles. The finishing work and connection of communications, stove and insulation of the room will take about the same amount.
The scope of work for the construction of a bathhouse on screw piles includes the following stages:

For large projects, with a maximum wall length of more than 6 m, it is easier and cheaper to order the assembly of a bathhouse from timber on screw piles in a complex from a specialized company, and carry out the interior decoration, installation and finishing of the room yourself.
If you are planning a bathhouse on stilts with your own hands, then it is quite possible to build a simple 3x4 m log house yourself, for example, for a summer house or a suburban area. You don’t even have to order a project, but use a standard solution and recommendations from specialists. In this case, you can save up to 20 thousand rubles only on the assembly of a small-sized screw foundation.
A building made of timber with a maximum wall length of up to 6 m can be built in tandem with one, or better yet, two assistants. True, it will take at least a month and a half to build the box, excluding screw piles. Lifting a profiled beam onto a bathhouse wall alone, as well as driving screw piles, is simply physically impossible work.
For your information! The weight of a standard six-meter piece of timber with an edge of 140 mm reaches 100 kg.
Choosing a pile foundation for a bathhouse
In the above bathhouse project, 11 screw piles with a diameter of 105 mm and a height of 2.5 m are used. Each support can withstand a load of more than 2 tons, so the stability margin of the structure is more than 2.2 times. 11 screw piles.
The installation plan is determined by the characteristics of the load distribution from the weight of the bathhouse walls. The steam room, washing room and living room do not have massive furniture or heavy objects, so the main load falls on the walls of the building.
The log house is not heavy, no more than 3.5 tons, has high rigidity, so for the foundation it will be enough to screw four screw supports under two opposite walls - front and rear. Three more piles are placed along the center line of the internal partition.
Conventional cold-rolled steel pipes with a two-layer epoxy coating are used as screw supports. Upon completion of the construction of the bathhouse, the base part is sewn up with a horizontal lath with a small gap for ventilation of the foundation.

Principles of installation of screw piles
To install the supports, you can use a specialized machine, a portable power tool, or wrap the pipes manually. The larger the diameter and the number of screw piles, the more arguments in favor of the mechanized method.

To wrap the support you will need:
- Construction plumb line;
- Gate pipe with a shoulder length of at least two meters;
- Ballast weight;
- Several tens of liters of clay solution in water.
Each pile is installed on the ground at the point of rotation, loaded with ballast and leveled plumb in a strictly vertical position. While one worker holds the screw support vertically, two assistants use a steel lever to screw the pipe into the ground, adding clay solution.
After installing all screw piles on the foundation field, marking cords are pulled and the pipe heads are cut so that the cutting line of all supports is in one strictly horizontal plane. Support platforms made of steel plates or strips of metal are welded onto the cut racks.
Making a frame
Before assembling the walls of the bathhouse from profiled timber, screw piles must be laid on the frame. The base frame is sewn from solid oak timber 150-200 mm or polished sleepers 220-250 cm long.
The strapping material is fixed on screw piles using anchor bolts with an undercut of the head to hide the nut in the thickness of the wood. Before fixing it on screw piles, each section of the strapping is checked with a building level and, if necessary, leveled with washers or thin metal. One of the options for tying the foundation of a bathhouse on screw piles is shown in the video
Assembling the log house
The installation of bathhouse walls on screw piles is practically no different from the process of laying profiled timber. The first beam is mounted on an adhesive or mastic base, the steel crowns of the bath are laid out “dry”, with a lining of jute or synthetic fiber.

If the bathhouse box is assembled from profiled timber, then the remaining cracks between the crowns are caulked with linen putten with the addition of wood glue. After assembling the strapping frame, subfloor logs are laid on screw piles on the timber using metal corners and “moths”. You can use a board with a cross-section of 150x40 mm or even an inch board, since the rough base does not experience any special load.
The floor in the bathhouse is on screw piles
The method of arranging the subfloor and finished floor depends on the assembly method and material. If a bathhouse on stilts is built from ordinary timber or logs, then only a subfloor is installed in the room.

Laying of the finished floor begins only after completion of the shrinkage processes. If the frame and load-bearing elements of the bathhouse are assembled from glued profiled material, then rough padding, insulation, waterproofing and the finished floor can be laid within a couple of months after completion of construction.
The level of packing of the lag beams of the subfloor is selected below the plane of the timber frame of the screw piles. The difference in height can be calculated by adding up the thickness of the padding boards, insulation and waterproofing membrane. After laying the sandwich on the floor, the plane of the foam insulation slabs should coincide with the piping line of the screw piles, as in the video

Bathhouse on screw piles: floor insulation
To assemble the subfloor of the bathhouse, an off-grade board is used; you can even use chain link or unedged lumber. The condition of the screw supports is not affected by the subfloor, the main thing is that the material is of the same thickness.
The boards are nailed onto the joist beams with ordinary nails, no screws, the fasteners are hit at the ends of the inch, moving 10-15 cm from the edge.
Sheet polystyrene foam is best suited for insulating the floor of a bathhouse on screw supports; you can take penoplex or technoplex. For middle latitudes, you can insulate the subfloor of a bathhouse with sheets 50 mm thick; if frosts in winter are more than 40 o C, then it is best to lay two layers of foam insulation.
Advice! Before laying the insulation, craftsmen advise laying a wooden strip with a cross-section of 20x30 mm around the perimeter of the subfloor. Thanks to it, the surface of the slabs forms a drain slope towards the hole, the water will not stagnate and drain much faster.

Waterproofing the floor in a bathhouse on stilts
Before laying waterproofing on the subfloor in slab insulation, it is necessary to cut a hole for the outlet of the bellows cup of the water drainage system. The diameter of the hole in the polystyrene foam should be equal to or 1.5-2 mm larger than the cross-section of the corrugated or plastic pipe.
After installing the corrugation, film insulation can be laid. The best option for a bathhouse floor on screw piles is the EPDM rubber membrane. The material is rolled out as a single sheet over the surface of the insulation, and applied to the walls 25-30 mm per side.

To hold the waterproofing sheet around the perimeter of the washing or steam bath room, an aluminum threshold is stuffed, pressing the material against the insulation.
At the drain point, a hole with a diameter smaller than the internal diameter of the drain is cut, after which the upper flange of the drain device is installed and the structure is tightened with a mounting screw.
Shower floors in a bathhouse on stilts
The next stage of building a bathhouse is installing the finishing floor. Metal mounting “moths” are first attached to the walls, on which the finished floor joists are laid. The distance between the beams depends on the size of the steam room of the bathhouse; the screw foundation ensures high rigidity of the base, but experts recommend installing the floor in the bathhouse on stilts with a step of 50 cm between the beams.

Floor boards are laid on the logs, usually 25-35 mm thick floorboards are made removable on wooden pins. The boards themselves are sanded and chamfered to avoid splinters and chips.
Between the floorboards there are gaps of 1.5-2 mm, this scheme ensures reliable drainage of water even with a large number of washes, and the removable floor of the bathhouse on a pile-screw foundation allows you to periodically remove the boards and clean the lower level.
Drain in a bathhouse on screw piles
The floor of the bathhouse, raised on screw supports, can be insulated from the outside by backfilling with perlite or ordinary polystyrene foam. The outlet from the washing compartment and steam room must be connected through a bellows and elbow to a plastic sewer pipe. The sump must have drain and flush taps, otherwise it will be difficult to clean it and drain the water if the bathhouse on stilts spends the winter without load.

If you plan to use the steam room all year round, then the drain ladder or corrugation is installed without a bellows, and the inlet opening must be closed with a removable lid. For winter baths on stilts, the use of a ladder is not recommended, since the water seal inside the body can freeze and break the mounting flange.
Conclusion
A bathhouse on stilts is rightly considered one of the most optimal options for designing a foundation. In addition to good waterproofing and high quality insulation, this scheme provides unhindered access to drainage systems and water pipes. Often, screw supports remain the only possible option for building a bathhouse on weak, waterlogged soil.
A bathhouse on screw piles is a durable and reliable building. It makes the most sense to build it on swampy soils and unstable soils. Let's look at the arrangement and insulation of the floor base in such steam rooms. This issue is of great importance for the comfortable operation of the bathhouse.
Pile foundation - optimal for baths on problem soils
It is most rational to build bathhouses in suburban areas with difficult terrain and type of soil on screw piles. This type of foundation has many advantages. Let us highlight the main ones:
- stability of the structure due to the strength of the supports;
- ease of doing the work yourself (by the way, they can be done in any weather conditions);
- effective ventilation of the space under the floor;
- high maintainability;
- increased reliability and durability.
In addition, the floors in a steam room on a pile foundation can be made in different ways. It is not difficult to choose the option that is suitable for us. Moreover, with proper arrangement, the floors will be well protected from melt and sediment water. This means we will get bases with a really long service life.
Most often, home craftsmen make the floor in a private bathhouse on screw piles from wood (so-called pouring structures) and concrete. The second option requires more serious financial costs. But concrete foundations are impervious to moisture. Due to this, they serve without accidents or deterioration in their operational technical properties for 25–30 years.
Wooden floors are easier to install and have a lower cost. They cannot be called durable. If we treat the wood used with special antiseptic compositions, the maximum service life of the floor base will be 9–10 years. No more. And without additional treatment, wooden floors in a bathhouse will have to be replaced after 3–5 years.
Next point. When arranging floors in a building on stilts, you need to carefully consider the issues of their high-quality insulation and drainage organization. Moisture from the steam room and washing room can be removed in several ways. The technology of the foundation also depends on which one we choose.
Plank bases - we make and insulate them ourselves
Wet floors are recommended for baths with a base of at least 0.5 m. If we plan to use the steam room exclusively in the summer, there is no need to insulate its wooden base. When using a building year-round, thermal insulation of floors is a mandatory procedure. To install a wooden floor base, we will need boards:
- well sanded (made of oak or larch) - for installing a finished floor;
- lower quality - for the rough part of the structure.
We also purchase beams. It is optimal if they have dimensions of 15x10 cm. But it is also possible to use products with more modest geometric parameters. The main thing is that they are reliable and can withstand the planned loads.
Installation of a poured non-insulated floor is carried out according to a simple algorithm. First, we cut the lumber into the required dimensions. We treat them with an antiseptic brush. Then we install logs (without the slightest slope!) on the foundation grillages (thick beams perform their function). We screw (you will need a screwdriver and self-tapping screws) the edged boards to them, forming a rough covering. After this, we install the finished floor using sanded wooden products. Between the individual elements we leave gaps of about 7–10 mm. These gaps are very important. Through them, water from the steam room will flow out freely. The finished base must be covered with drying oil (preferably two layers).
Insulated floors are a little more complicated. We will have to take care of organizing high-quality drainage, hydro- and thermal protection of the foundation under construction. The procedure will be as follows. We lay the beams on a slope, securely fixing them with dowels of suitable length. Important! For every meter of beam, the slope should be 1 cm. We arrange a rough foundation. We install logs on it. Between the latter we lay insulating material. Experts advise using expanded polystyrene (extruded) slabs as such. It does not get wet and is characterized by excellent heat-protective properties.
We cover the insulation with a vapor-waterproofing membrane. We lay it towards the floor base with an absorbent surface!
We install the membrane with a 15-centimeter overlap on the walls of the bathhouse. We fix the vapor barrier along the edges with aluminum slats.

We are organizing the drainage. We fit the sewer pipe as tightly as possible to the rough base and waterproofing layer. Carefully seal the remaining gaps with sealant. We fill the finished floor. We install the boards very tightly. We knock them out with a mallet. We should not have any gaps between the individual elements of the base. The insulated wooden floor is ready!
Installation of concrete floors - what will be the scope of work?
Concrete bases are less common in private baths. This is due to the need to perform a number of labor-intensive works and their high cost. However, some home craftsmen want to make just such floors in their bathhouse. Let us describe the process of their installation. First of all, we will carry out several preliminary measures (they are carried out before pouring the concrete base):
- 1. We draw up a diagram for laying sewer and water pipes on the floor. We lay them in accordance with the plan made.
- 2. We make a drain - a hole to which the drain is connected. The latter must be equipped with a dry water seal (it will prevent the formation of a musty smell in the bathhouse in cases where it will not be used for a long time). We place the ladder grating at the lowest point of the future concrete floor.
- 3. Under the base of the steam room, create a cushion of crushed stone and sand about 4 cm thick.
- 4. We lay waterproofing material (usually roofing felt) over all sections of the pile foundation. A small nuance. Instead of roofing felt, a vapor-permeable membrane can be used. It copes better with the tasks of waterproofing the floor. But its cost is quite high. Choose the best option for yourself, taking into account the budget allocated for the construction of a private bathhouse.
Now you can pour the cement-sand mixture. When it hardens, we begin to insulate the floor. The concrete surface is insulated with expanded clay, polystyrene foam boards, mineral wool or perlite. Before installing any of these materials, thoroughly clean the floor surface of debris and dust.

After installation, expanded polystyrene slabs must be treated with polyurethane foam. With its help, we seal all seams between thermal insulation products. When the foam dries, we additionally waterproof the surface with roofing felt. We do the same when we insulate the floor using mineral wool, since it is very afraid of water. When exposed to moisture, cotton wool loses all its protective characteristics. Perlite or expanded clay is mixed with cement and water before laying on a concrete base. The resulting solution is evenly distributed over the surface.
As you can see, installing a concrete floor base in a steam room on screw piles does not require special knowledge. All work can be done without the help of professionals. And then enjoy a long-lasting and warm floor in a private bathhouse.
In contact with
Classmates

Frame construction technologies are gaining popularity and gaining more and more attention among people, those who want to build quickly, efficiently and inexpensively.
Frame structures are simpler and more cost-effective for construction in holiday villages, villages and hamlets.

One of such structures is a frame bathhouse, construction which does not take much time.
Such the structure does not require a particularly strong foundation- to build it, it will be enough to arrange it, fill it, or make do with it.
Features of floors in wet rooms

Considering constant humidity, water ingress, temperature changes, the entire structure of the floor and floor covering in particular must be moisture resistant and resist rotting.
At the same time, it should be warm and comfortable.
in a frame bath begins with the installation of the frame- laying lags. In cases where the support of the bathhouse is piles with a grillage made of metal or concrete columns, then a wooden beam of large section 150 * 150 is attached on top of them, followed by attaching a log to it, and which will serve as the basis for the walls. Waterproofing materials are laid in places where wooden parts meet metal and concrete.
As a rule, frame baths are designed according to individual sizes. And sometimes it is necessary to have additional intermediate beams in the frame. In this case, under long logs and additional beams arrange additional support pillars to reduce the load on the elements.
Attention! When constructing wooden structures, it is important to remember that the elements must be treated with antiseptics and fire retardants.
After the support beams and logs have been installed, you can proceed directly to organizing the floor in the frame bath.
Layers

Often the overall floor structure is called a pie, which includes layers of rough and finishing coatings with additional elements between them.
Black floor in a frame bath they are made of OSB boards 6 mm thick, nailed to the bottom of the logs. Subsequently, layers of hydro- and thermal insulation will be installed on this floor layer. A hole is left here for the drain pipe.
Finish floor when installing a frame bath, they call the installation of the floor covering directly in the form of a finishing layer - most often ceramic tiles laid on a screed.
Kinds

The floors in the bathhouse, unlike ordinary floors in frame house, have their own characteristics - in addition to reliability and durability, they must ensure water drainage.
That is, the floors in the bathhouse are a unique element of the sewer system. They should also be warm if the bathhouse is used all year round, and easy to clean and ventilate.
In the construction of bath floors, there are two methods of organization:
- leaking floors;
- leak-proof wooden floors.
Leaky wooden floors are most often intended for summer use. They are simpler to construct, but preparation for their installation begins when the foundation is being erected or the piles are being driven in. To do this, a pit up to 700 mm deep is dug in the center of the underground perimeter and a concrete slope is formed towards it from the edges of the underground. This will allow the falling water to flow into the pit, from where it will be drained through a pipe into the prepared cesspool.
Leaking

The design pie in leaky floors is presented as follows:
- Bottom beams mounted on piles or concrete columns.
- Bottom crown beams attached to frame beams.
- Floor boards, screwed to the floor beams in increments of 5-7 mm, with a thickness of at least 20 mm.
Leaking floors in frame baths are usually suitable for small design dimensions. Such a bathhouse serves as an ordinary summer shower, only of a more reliable design. A floor constructed in this way allows water to pass through well and does not retain water, and is well ventilated. In sunny weather, staying in the bathhouse is a real pleasure. However, in bad weather, the blowing wind can cause discomfort.
Leak-proof

Non-leakage floor in a frame bath is a multi-layer structure designed for year-round use.
It is more difficult to install, but is more reliable and durable. In the organization of such a floor, a rough and finishing floor is arranged. The design pie looks like this:
- Subfloor made of OSB boards 6 mm thick.
- Waterproofing and windproofing.
- A layer of thermal insulation (most often ecowool or mineral wool).
- Protective layer made of OSB 18 mm thick.
- Two layers of insulation (most often polystyrene foam).
- Vapor barrier layer.
- Reinforcing fiberglass mesh.
- Warm floor system.
- Concrete screed with reinforcement.
- Finish floor covering.
One of the main advantages of organizing such a floor is its reliability and comfort in use. In such a bath it is convenient to steam and take a shower both in summer and in cold winter. It is always warm and dry in any climatic conditions.
Design options for different types of foundations
Depending on the type of foundation for a frame bath, we will consider installing the floor on the following basis:
- pile or columnar;
- tape;
- slab
Pile or columnar

The most convenient and easy to install- this is the floor in a frame bath on. He is not afraid of either dampness or frost.
Such a foundation can be easily corrected in case of subsidence (it is enough to jack up the corner and place a pad on the pillar or pile).
The cross-sectional design of all floor elements is the same as that used to organize leaky and non-leaky floors in a frame bathhouse.
Tape

It serves as the basis for a frame bathhouse, which is distinguished by its large dimensions and, as a rule, includes several rooms.
The construction of the floor in such buildings is also capital, most often it is a concrete floor. When organizing flooring The cross-section of the constructive pie looks like this:
- A sand cushion laid on compacted soil.
- Waterproofing layer.
- Insulation (extruded penoplex).
- Reinforcing mesh.
- Warm floor system.
- Screed.
- Clean floor covering.
When installing such a floor, even before pouring the foundation, you should decide in which direction the water should be drained and the sewer pipe should be laid.
Slab

During the construction of frame baths It is quite rare, especially in cold latitudes, for a number of reasons:
- The bulkiness of the structure.
- Difficulty in laying communications and draining water.
- Difficulty in heating during the cold season.
- Significant financial costs when pouring the foundation.
Nevertheless The floor pie with this basis has the following structure:
- Sand pillow.
- Expanded clay layer.
- Reinforced concrete slab.
- Waterproofing layer.
- Insulation.
- Warm floor.
- Screed layer.
- Finish floor covering.
Installation instructions

How to make floors in a frame bathhouse with your own hands?
Arrangement of the floor in a frame bath is not particularly difficult however, depending on the seasonal use of the premises, it requires certain skills.
Considering that the most commonly used basis for the subsequent construction of walls are piles and concrete pillars, we will consider their example basic steps and processes for installing a leak-proof floor:
- The first step is to determine the location of the water drainage and install a sewer pipe.
- Load-bearing crown wooden beams - frames - are laid on piles (pillars) covered with waterproofing.
- Joists and cross beams are attached to the frame.
- The OSB of the subfloor is screwed to the bottom of the joist. A hole is also made here for the drain pipe.
- A layer of waterproofing is laid on the subfloor. It should be laid so that it covers the entire area of the subfloor. The joints of the film are fixed with mounting tape. The waterproofing is installed on the joists using wooden slats.
- Produced using ecowool or mineral basalt wool.
- OSB sheets are sewn over the logs.
- A second layer of insulation is laid - extruded polystyrene foam.
- The drain hole is waterproofed using a special film and sealant.
- A metal grate is laid and the contours of the heated floor are drawn.
- The screed is poured over the heated floor.
- After the screed has completely dried (from 14 to 28 days), the surface is ready for laying the floor covering on it.
- The floor in the washing area is tiled; in the sitting area you can install treated boards.
Useful video
How to make drainage from a bathhouse on screw piles is additionally described in the video below:
conclusions
In general, installing a floor in a frame bathhouse requires careful consideration, competent and informed decisions, and basic skills in using construction tools. Because a properly organized design is designed to ensure long and comfortable operation of the entire structure as a whole.
The final result depends on how carefully the rules and regulations are followed during construction, how responsible the attitude to detail is, and how high-quality the selection of materials is.
In contact with
The arrangement of a recreation area on the shore of a reservoir or on a slope assumes that the floor in the bathhouse on screw piles will be installed taking into account the characteristics of alluvial or sedimentary soil. It is these rocks that make up the soil on the banks of a river or pond, slopes, and hills.
The foundation for a bathhouse on screw piles is suitable for location on a slope, so it is possible to adjust the height of the pile
Advantages of a foundation on screw piles
Installing a floor in a bathhouse on screw piles is much easier to do than on a massive foundation. Advantages of this design:
- the foundation can be installed very quickly with your own hands;
- screw piles noticeably compact the soil, ensuring the stability of the entire structure;
- the foundation is convenient to repair if necessary;
- installation of screw piles is easy to do using modern devices and devices;
- the foundation can be installed in any weather;
- screw piles provide effective automatic ventilation of the underground space of the bathhouse;
- the service life and reliability of the pile foundation are quite long;
- a properly installed floor will protect the walls of the bathhouse on screw piles from the absorption of sediment and melt water from the soil;
- a screw foundation can be installed on unstable soil, which swells and swells during the season of heavy rainfall.
 The foundation for a bathhouse on stilts can be installed even in winter
  A screw pile foundation can be installed very quickly
 The advantages of a pile foundation make its installation quick, and its operation reliable, simple and convenient. The main thing is to first study the properties of the soil in the area chosen for the bathhouse, carry out all the calculations correctly and carry out the necessary work in strict accordance with the instructions.
 Screw piles must be selected depending on the type of soil
 Screw piles are installed for all load-bearing walls and elements
 What is the floor in the bathhouse made of?
The floor in a bathhouse on screw piles can be made from different materials. Concrete screed and coniferous wood are mainly used. Installing a concrete floor will require significant material costs. However, such a floor is resistant to constant exposure to moisture. Therefore, the concrete floor in the bathhouse will last for decades. Wood is a lower cost material. However, when exposed to moisture, a wooden floor quickly deteriorates. Treatment with an antiseptic will significantly slow down this process. But after 7-10 years, the wooden floor will need to be replaced.

 The concrete floor in the bathhouse is most resistant to moisture
 The advantages of a wooden floor are not only the low cost of the material. If necessary, you can replace damaged elements without completely changing the coating. If you regularly re-treat wooden components with an antiseptic, you can almost double the service life of such a floor. The optimal option is when a concrete screed is made in rooms of high humidity - steam room and washing room. You can make a wooden floor in the locker room and rest room, because the humidity level here is much lower.

Preparatory work
So, the foundation is installed and the walls are erected. Now we are making the floor in the bathhouse on screw piles. You need to thoroughly prepare for this work, study the technology, purchase everything you need, and invite assistants.
For work you will need the following materials:
- tongue and groove board;
- beam;
- fastening material - nails, etc.;
- cement;
- coarse sand;
- expanded clay and/or other bulk materials;
- roll waterproofing;
- antiseptic composition;
- mineral wool or other insulation.
Tools and equipment for work will require:
- construction mixer;
- tank for mixing the solution;
- wood hacksaw;
- grinder saw;
- construction knife;
- hammer;
- mittens, work clothes, rags.
The list of necessary tools and materials can be specified after it has been determined from what material and in what way the floor in the bathhouse will be installed on screw piles.
Floor insulation: general rules
Before installation and insulation of the floor, it is necessary to carry out an antiseptic treatment of all wooden components of the finished structure. A special composition for this can be purchased at a construction supply store. An antiseptic will protect the wood from the penetration of harmful microorganisms that can destroy it.
 The depth of floor insulation depends on the premises of the bathhouse
 If a bathhouse on screw piles will be used in winter, floor insulation begins with laying insulation between the supporting elements of the building. Most often, mineral wool (layer thickness 25 cm) or polystyrene foam (layer thickness 15 cm) is used for this.

If the thickness of the beams is insufficient for laying insulation, additional bars are attached to them perpendicularly. Waterproofing is pre-installed. On top of it, between the beams, the bottom layer of insulation is laid out. The top layer is laid between additional bars. Next, another layer of waterproofing is laid, on top of which the finishing floor is mounted. An insulated layer in a bathhouse on screw piles will extend the service life of the structure and significantly increase the comfort in the bathhouse.

Base installation
Effective insulation of the floor in a bathhouse on screw piles is done using a base, which is mounted around a pile-screw foundation. The plinth reliably closes the free space under the bathhouse floor from the penetration of cold air and significantly improves the appearance of the finished building.
 The empty space of the plinth is covered with some panels
 The main materials for the plinth are thermal insulation boards and decorative panels. An additional layer of heat insulation is laid between them. Typically, penoplex, polystyrene foam and similar materials are used for this. Sealing the joints between the panels after assembling the base is done using polyurethane foam.
 To reduce heat loss, insulate the basement under the bathhouse
  You can insulate the base of a bathhouse using penoplex.
 Installation of a pouring floor
The optimal solution is considered to be a poured floor in a bathhouse on screw piles. In the cold season, it is necessary to carry out mandatory insulation of the entire structure.
A large amount of water gets on the floor in the bathhouse, so it is necessary to increase its moisture resistance and trouble-free removal of used water. To do this, it is necessary to equip a special drain ladder. Through it, water will flow into the sewer pipeline or into the drainage system.

Installation of the pouring floor begins by laying logs on the grillage. They are placed strictly horizontally without tilting. Edged boards made of coniferous wood are fastened to the logs with nails. Gaps 7 mm wide or more are left between them. Even if the wood swells, the gaps between the individual elements will still remain. Used water will pass through them freely.
To protect the subfloor from the accumulation of water, you need to install a concrete screed in it in the shape of a cone with an inclination towards the sewer or drainage system.
Advice! To avoid the appearance of unpleasant odors and/or harmful microorganisms, the concrete structure must be regularly washed, cleaned and treated with special compounds.
 To prevent anything from rotting and moisture from accumulating, it is necessary to install a concrete bowl with a drain in the bathhouse
 Dry wooden floor in the bathhouse
The dry floor is laid from boards in 2 layers. First, the subfloor is installed. A waterproofing agent is placed on top of the boards. Then the insulation is laid. On top of it is another layer of waterproofing. Finally, a finished floor covering is laid. For this, a tongue-and-groove board made of durable softwood is used. Individual floorboards must be laid close to each other without cracks or gaps. When laying the finished floor, a slope to one of the corners of the room is required. A hole is made here under which the siphon is attached. This will help you easily remove used water during use of the bath.
Before pouring a concrete floor, it is necessary to carry out preliminary work in a bathhouse on a screw foundation:
- laying water supply and sewerage pipes;
- installation of a ladder on which the finishing floor will be laid;
- forming a cushion of bulk material under the base of the bathhouse building;
- laying roll waterproofing on foundation sections;
- laying insulation.

Nuance! It is better to fill the pillow for forming a floor cake from bulk material of different fractions, which must first be completely dried.
Insulation of concrete floor
The concrete floor in a steam bath on screw piles begins to be insulated when the screed sets and hardens. The following is usually used as insulation:
- extruded polystyrene foam;
- expanded clay;
- perlite;
- mineral wool.
 Bath floor insulation: perlite, expanded clay, polystyrene foam, mineral wool
 Before laying the insulating layer, it is necessary to completely clean the surface of the concrete floor from foreign objects, dust, debris, etc. Then roll waterproofing is laid. Fractional insulation is applied as part of a special mixture. After it dries, a cement screed is poured on top.
Tile insulation requires sealing the joints between panels after installation. This is usually done using polyurethane foam. After it dries, a 2nd layer of roll waterproofing agent is applied. To evenly distribute the load on the floor in a washing bath on screw piles, in a steam room or in another room, a reinforcing mesh is laid.
 You can insulate a pouring floor in a bathhouse using expanded clay; it must be laid before the concrete screed
 Floor tiling
Ceramic tiles can be laid on top of the wooden floor in the bathhouse. In this case, instead of boards, fibreboard, fiberboard or plywood are used for the rough coating.
 In the washing compartment you can lay tiles on the floor in the bathhouse
 Ceramic tiles are laid on top of the laid sheet covering. It's done in the usual way. Under the tiles, you can lay a system heated floor in a bathhouse on screw piles. You can use a hydraulic or electric infrared option.
 In the locker room you can install a heated floor in the bathhouse

Preventive measures
A bathhouse on screw piles has a high level of moisture; special preventive measures will help make the floor inaccessible to fungus and mold, which inevitably appear in a humid environment. During the construction process, all structural elements used must be coated in several layers with a special antiseptic composition.
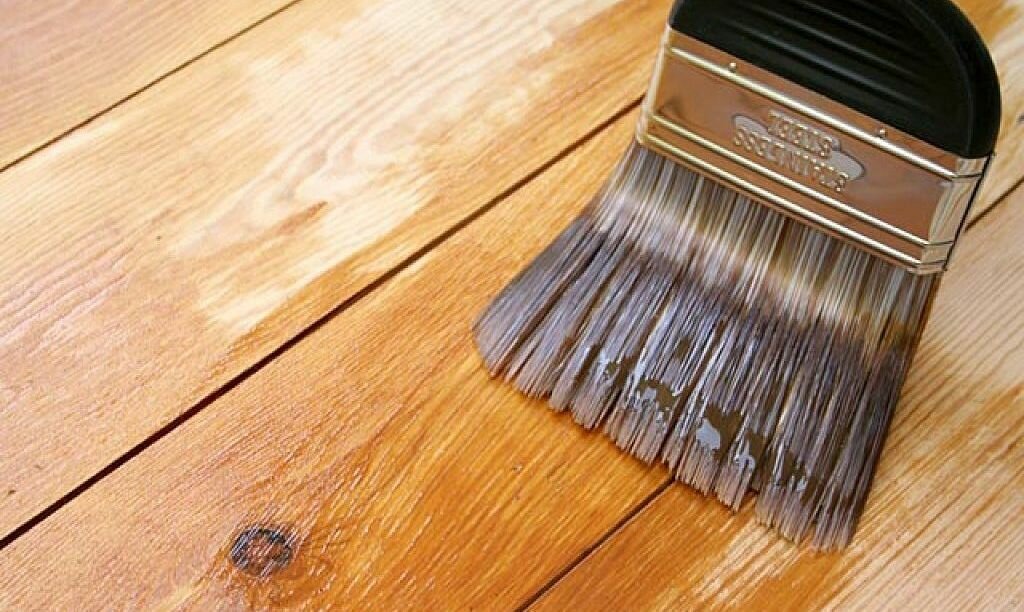 To prevent the floor from rotting longer, it is necessary to cover it with an antiseptic against fungus.
 It is imperative to use high-quality waterproofing materials. This can be roofing felt or plastic film. These measures will help increase the service life of the structure and protect it from rotting and premature destruction.

If pockets of rotting of the wooden material are noticed, the entire structure must be dismantled. Damaged elements need to be replaced.
Nuance! After thorough drying, treat all components with an antiseptic and dry again. Before assembly, you need to coat the wooden elements with wax or water-repellent varnish.